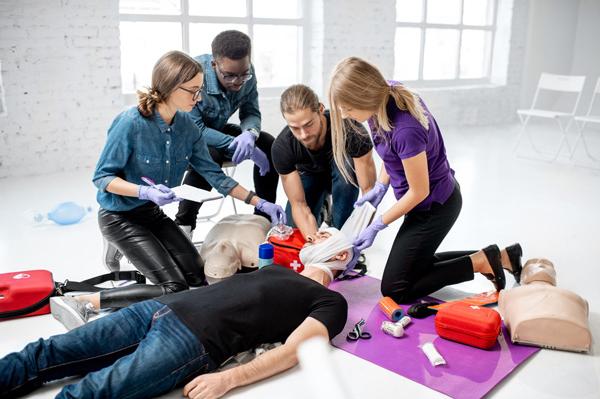
No one hopes to be in a situation where either they or someone around them is left unconscious as a result of any variety of near-fatal health complications or external accidents. However, it may be safe to say that most people, if not all, would prefer to know what to do when a similar incident arises while a medical team is nowhere to be seen. We at EMCARE understand this deeply and have put together a basic guideline of how you can help using the knowledge that is gained via our basic CPR (Cardio Pulmonary Resuscitation) and AED (Automated External Defibrillation) first aid training course.
Why and How CPR is Used During Certain Medical Emergencies
For those who have not been in a situation where someone near you is left in critical condition, it can be traumatic for some when they themselves are left unable to provide any help at all as a result of their lack of first aid training. While it may be impossible to avoid medical emergencies altogether, it is entirely possible to avoid having panic and confusion set in by simply knowing what to do during certain situations as well as how to perform certain medical manoeuvres. These manoeuvres, while intimidating at first glance due to their context alone, can be learnt and nearly perfected with a fair amount of ease, when practised consistently over time, and is one of the most widely encouraged skills anyone can have in their arsenal.
The first thing to know about CPR is when it is needed to be performed or not. This is a crucial aspect to first aid training that needs to be understood thoroughly as it can be easy for fear and adrenaline to get in the way of a clear mind. Thankfully, there are certain signs that may become present within each medical emergency that you can give clues on which approach to take. These signs may not all be the result of the exact same medical reasons, such as heart attack or cardiac arrest, but they can and will inform you on whether or not CPR is needed at the moment.
The first and most basic clue to look out for is to see whether or not the person is breathing or not. It has been recorded that the average person is only able to go up to six minutes without oxygen before their brain begins to experience permanent trauma while their heart stops beating. This gives you a small, but manageable, window to start circulating reoxygenated blood throughout their body via the use of CPR. This in turn will then give you the chance to save the victim in question from irreversible damage or even death.
Another clue to look out for is to see if the victim is unconscious or unresponsive. Before performing CPR, it is wise to check for a pulse as this will indicate how much more serious the situation may be. In the event that there is no heartbeat, then their body is not receiving any oxygen and should be attended to immediately. When left unconscious in a critical condition for long enough, the victim may lose control of their breathing, emphasizing how important it is that you remain calm and with a full understanding of how to intervene effectively and with efficiency.

If you are still unsure of whether or not CPR is needed in certain situations, it is important to take a step back and look at the accident itself. By taking note of if the victim has been electrocuted, almost drowned, been in a car accident, experienced a sudden collapse or cardiac arrest, etc, along with all of the aforementioned clues, you will be given plenty of indicators that let you know how to proceed.
Now that you have determined if you should be using CPR on the victim or not, here are the necessary first aid training steps to take if you are left without any nearby emergency response:
- Observe the scene of the incident for the safety of yourself, those around you and the victim to gain a solid first impression of the incident in question.
- If the victim displays no signs of responsiveness, it is important to then lookout for signs of breathing, severe bleeding or any other life-threatening conditions using the shout-tap-shout manoeuvre.
- Shout-tap-shout involves you shouting nearby the victim’s ear, tapping on their shoulder, and then shouting again to observe for any signs of responsiveness
- If the victim does not display any signs that confirm their responsiveness or breathing, make sure to call a nearby hospital and emergency response unit while gathering any nearby personal protective equipment available.
- Gently reposition the victim on their back, placing them on a firm and flat surface.
- Give only 30 chest compressions using the correct hand placements and timing, etc.
- For adults, both hands should be centred on the victim’s chest. For children, only one hand is needed. For infants, only two fingers are needed.
- Your shoulders should be directly over your hands, with your elbows securely locked.
- For adults, you should push to a depth of only 2-3 inches into their chest. For children, only 1.5-2 inches and only 1.5 inches for infants.
- You should be pushing at a rate of 100 to 120 compressions per minute, using a metronome app on your phone can greatly improve your timing.
- It is recommended and should be emphasised that you allow the chest to return to its normal position after completing each compression.
- Give only 2 breathes using the correct mouth and hand placements along with timing.
- Place the victim’s airway to an open and clear position by tilting their head back with their chin lifted.
- Make sure that you give a breath that lasts only 1 second, also ensuring that their chest rises with each breath and allowing all air to exit before administering the next breath.
- If the victim’s chest does not rise with the first breath, consider repositioning their head before giving the second breath. If their chest still fails to rise, then there may be something blocking their airway.
- Give additional sets of exactly 30 chest compressions in-between sets of 2 breaths until the victim becomes responsive or an AED becomes available.
- It should be noted that these techniques, while possible to do without adequate first aid training, is best conducted by someone in the area with the most experience in the matter.
How and Why AEDs Are Used During Certain Medical Emergencies

AEDs can be an invaluable tool to help save someone’s life during critical situations. While it can essentially bring many back to life when all hope seemed to have been lost, it should not be turned to as your first option. AEDs should instead be used when using CPR techniques has not been successful.
This is because this device is able to deliver its patient an electric current that is powerful enough to kickstart their heart back to life. These tools are usually used once CPR has been conducted without success after the victim has experienced a heart attack or have been unconscious without any signs of responsiveness. While many people believe that only those within the medical industry have access to AEDs, it is entirely possible for business and homeowners to purchase their own defibrillators for when a critical emergency strikes. With such powerful tools now being openly available for purchase to the public, it is crucial that those interested are given the correct steps and guidelines on how to use their own defibrillator for when the situation arises.

Here are a few first aid training steps that describe how to attach and operate an AED on someone in need:
- Firstly, it is crucial that you make sure that the victim, as well as the area around them, is dry.
- If not, then they need to be dried off and moved to a safer location, as any moisture can result in serious injury as a result of the AEDs electric currents.
- Next, you need to prepare the chest area by shaving any hair and removing any jewellery that may be getting in the way.
- Due to the AEDs electric current, it is important to remove any metallic accessories from the victim, including bras with underwiring, necklaces, etc.
- AED’s also usually come with a razor for when the victim has any hair that needs to be removed first.
- After this, you will then need to turn the AED on and attach all necessary cables into the machine itself.
- Thankfully, most modern AEDs are equipped to instruct you on how to attach these cables as well as how to prepare the victim after doing so.
- Apply all necessary pads onto the victim in their correct positions
- These pads are usually adhesive for easier attachment and should be placed on the upper right side of the victim’s chest below the collarbone as well as below the left peck/breast just below the heart.
- Make sure that there is no fabric, hair, or any other objects in the way of the victim’s skin and the pads as this will result in the AED malfunctioning.
- If any implants or piercings are found nearby, place the pads necessary pads at least an inch away.
- Now you can let the AED analyse the victim’s heart rhythm while informing everyone nearby to remain clear.
- After analysing, the AED will inform you on whether or not the victim needs to be shocked or not.
- If no shock is needed, it means the victim has either regained a pulse, has an unshockable heart rhythm or needs further CPR.
- Shock the victim if the AED has informed you to do so.
- Re-ensure that everyone nearby is clear of the victim
- AEDs only give a single shock per attempt. This is a powerful shock that will cause the victim to jolt from the force, so be prepared.
- Continue CPR until responsive
- After each shock, it is recommended that you continue CPR for an additional 2 minutes before shocking them again.
- The AED has a 2-minute timer to help inform you to reanalyse the victim.

Who to Turn to for Further First Aid Training Courses?
Now that you are a bit more brushed up on when and how to use CPR techniques and AED machines, you may be interested in furthering your first aid training as either a potential career path or to just simply keep yourself and those around you protected. Thankfully, EMCARE has a variety of branches throughout South Africa that provide widely esteemed and sought after first aid training courses that have allowed thousands of now qualified emergency responders to help save countless more. To get started on your first aid training, amongst many of our other similarly extensive courses, you simply need to click on the “Contact Us” button that can be found at the top right side of this very webpage. From this point, you are given a variety of contact options to help make enrolment as convenient for you as possible.


